Magento 2 Manual
Before Starting
Available Payment Methods
The payment methods that are available via Magento 2:
| Country | 14-day invoice | Direct Debit | Campaign invoice | Fixed instalments | Flex payment | B2B invoice | Pay in 3 |
|---|---|---|---|---|---|---|---|
| The Netherlands | x | x | x | x | |||
| Belgium | x | x | |||||
| Germany | x | x | x | x | |||
| Austria | x | x | x | ||||
| Switzerland | x | ||||||
| Sweden | x | x | x | x | x | ||
| Norway | x | x | x | x | x | ||
| Finland | x | x | x | x | x | ||
| Denmark | x | x | x | x | x |
Merchant Portal Account
Please be make to create a free Merchant Portal Account to get in contact with sales and complete the integration process.
Compatibility
Minimum Requirements:
-
PHP 7.1
-
For connections through the REST API, PHP CURL is required
-
For connections through the SOAP API, PHP SOAP is required
-
The minimal version of Magento Community is 2.3.

Step 1: Install Riverty Plugin
While the Riverty onboarding process is ongoing, you can already install and activate the Riverty plugin.
The Riverty module is available through two channels. Either via Composer (preferred method) or via the Magento marketplace
Install the Riverty plugin via Composer (preferred method) , please follow the below steps:
Access Your Magento 2 Root Directory:
-
Use SSH to log in to your server and navigate to your Magento 2 root directory.
-
Use Composer to Install the Plugin:
1. Run the following command to install the Riverty plugin:
composer require arvato/afterpay-magento-2-extension
2. Update the Magento Configuration:
After the installation, update the Magento configuration by running:
php bin/magento setup:upgrade
php bin/magento setup:di:compile
php bin/magento setup:di:compile
php bin/magento setup:static-content:deploy
Note. after this step the Riverty plugin will be added to your webshop configuration file and enabled.
3. Flush Cache:
Finally, clear the cache to apply the changes:
php bin/magento cache:flush
Install the Riverty plugin via the Magento marketplace, please follow the below steps:
For those who want to install the Riverty plugin via the Magento Marketplace applicable to any version before Magento 2.4 - you will be re-directed to your Magento2 admin dashboard for that, you can use Magento 2 web setup wizard function. Please follow the below steps:
- Open your Magento Admin page
- Go to System > Web Setup Wizard
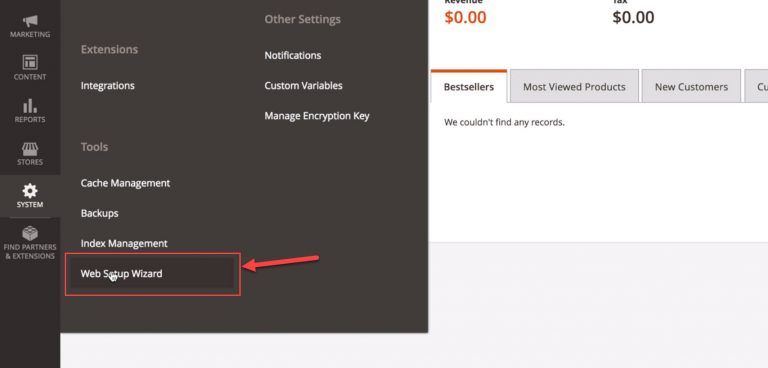
- Log into your Magento 2 marketplace account
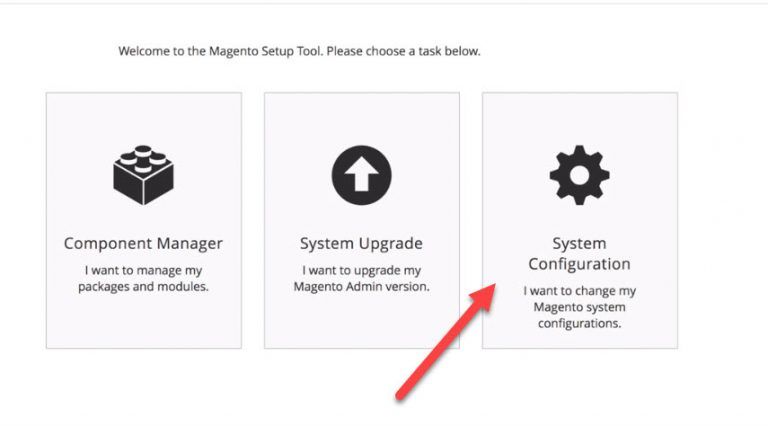
3.1 Click on System Configuration and sign in using your Magento 2 marketplace account
3.2 Now enter public access key and private access key you retrieve from your Magento market place account
Note. Note. You can get access keys in Access Key section on Marketplace account page

3.3 Go to component manager section (see below Image 1)
3.4 Click on install, the new page Extension Grid will display all item on your marketplace account
3.5 Go to Extension Manager
3.6 Go to Riverty Plugin Extension ready to install > Review and install. The Riverty extension will appear somewhere at the top of the list (Name: afterpay/afterpay-module). . The latest version is already selected. Click Install to install the extension (See below** Image 2**)
3.7 After the above steps are done, Magento 2 will bring you to readiness check page to check if your system is ready to install the Riverty plugin in Magento 2
Image 1.
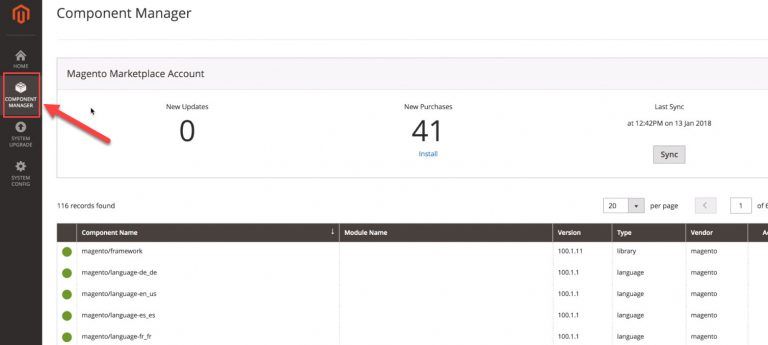
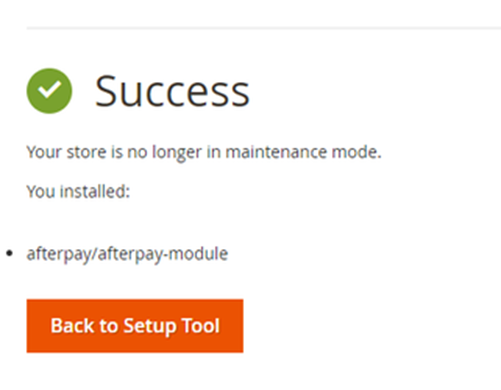
Image 2

- Magento will check if your instance is ready to install the plugin
For example, if you are using Riverty in the Netherlands, your web server will need to support PHP REST Magento will check this for you. If there is a missing required component, Magento will ask you to enable it
-
Next, Magento will make a backup, so you can roll back to a known-good configuration if something goes wrong. You can choose what to back up. Create the backup and continue to the last step
-
The last step installs the plugin
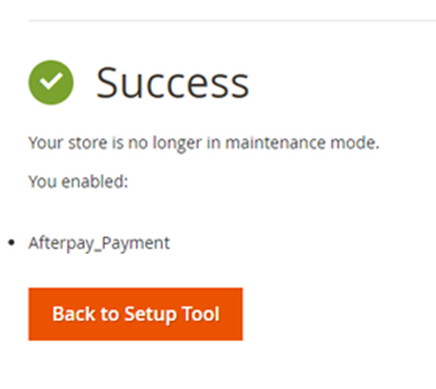
When the installation is done, you will see the following:
Enable/activate the Riverty plugin
If you succesfully installed the Riverty plugin via the Composer Package explained above (preferred method), then Riverty plugin has been as well already enabled.
If you have installed the Riverty Plugin via the Magento 2 Marketplace/ Wizard, then the Riverty Plugin is now installed, but still has to be enabled.
Follow the below steps to enable the Riverty plugin:
- Open your Magento Admin. Go to the Module Manager, and click Enable on the row with the Riverty plugin (see below Image 1)
- This will take you to a similar wizard as the installation, starting with a “readiness check”, followed by the “backup”, and finished by “enabling” the module. When the module is enabled, you will see a success page (see below Image 2)
Image 1

Image 2
When the module is successfully enabled, it should appear in the payments configuration under Stores > Configuration > Sales > Payment methods.
Note: Starting with Magento 2.4.0, the Web Setup Wizard is removed, and you must use the composer (preferred method) to install or upgrade Magento, as well as modules and extensions.
You are set to go, you have now installed and activated the Riverty plugin
Step 2: Select Plugin Settings
The Riverty Plugin provides several settings which need to be configured before the individual payment methods are configured.
Note. If you need support, feel free to reach out our merchant support team support@riverty.com
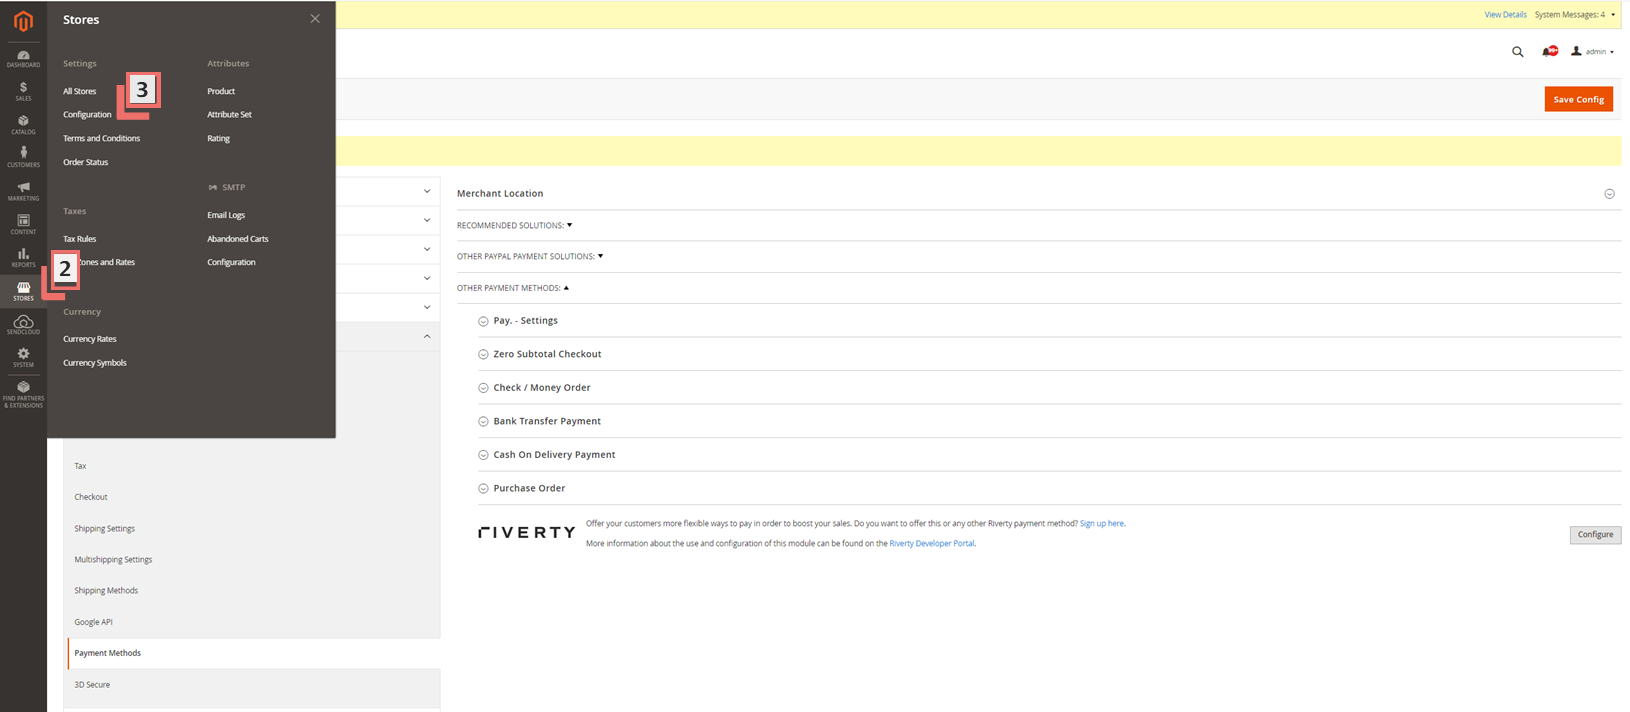
- Log into the Magento2 admin environment
- Click Stores in the left menu
- Click Configuration
-
Click Sales
-
Click Payment Methods (wait to load)
-
Click Configure
-
Click Settings
Configure Riverty Payment Methods”. This step must be completed for each selected country-payment method combination with a different API Key (you will get a different API Key per Country, per payment method and per Webshop) For example, if you offer 14-day Invoice in the Netherlands and Belgium, you need to repeat this step twice with two different API Keys.

-
Expand Payment methods per country
-
Expand your desired country (Netherlands is selected in the screenshot)
-
Expand your desired payment method (14-day Invoice is selected in the example)
-
Select Yes in Enable payment method
-
Select Production in Connection mode
Note, if you are testing with your Test API Key, select Test instead
- Enter your API Key from the Merchant Portal into Production mode API Key.
Note. A Live/Production API Key will be shared after succesfully finalizing the Riverty Onboarding process. If you need support, feel free to reach out our merchant support team support@riverty.com
Note, you may use your Test API Key from Merchant Portal in Test mode API Key if you prefer to test before going live
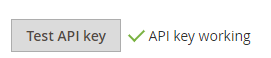
- Click Test API key and a green checkmark should appear. If the API key test fails, double check the key for typos and confirm it is for the selected environment.
- Click Save Config
Note, if you are testing first, you will need to repeat this step with your Production API Key when you are done with testing.
Configurating Riverty:
The Riverty Plugin provides several settings which need to be configured before the individual payment methods are configured. Adjust Access Plugin Configuration Panel. The availability of payment methods defers per country because of local demand and legislation.
Once Riverty is installed, activated, and you have the API keys, you can customize the Riverty plugin settings.
Country Settings
| Setting | Description |
|---|---|
| Enable payment method | Enables or disables Riverty payment methods (Mandatory) |
| Maximum order total | Upper threshold for order amount (Optional) |
| Connection mode / Environment | Choose between Live/Production or Partner Test/Test (Mandatory) |
| Production mode API key | Live API Key from the Riverty Merchant Portal (Mandatory) |
| Test mode API key | Test API Key from the Riverty Merchant Portal (Needed for testing) |
| Enable IP restriction | Restrict Riverty payment method access to specific IPs (Optional) |
| Payment method display position | Order in which the Riverty payment method appears at checkout (Optional) |
| Client ID For profile tracking | ProfileTrackingID provided by a Riverty implementation manager (Mandatory for Live setup) |
Advanced Settings
| Setting | Description |
|---|---|
| Exclude Riverty for shipping methods | Riverty payment methods will be hidden for the selected shipping methods (Optional) |
| Minimum Order Total | Minimum order amount required to display Riverty payment methods at checkout (Optional) |
| Payment from Applicable Countries | Choose whether all allowed countries or only specific ones can use Riverty (Optional) |
| Payment from Specific Countries | Restrict Riverty availability to selected countries (Optional) |
| Success Page URL | URL where the customer is redirected after a successful order. Leave blank to use Magento's default (Optional) |
| Enable Terms and Conditions | Show or hide terms and conditions text for Riverty payment methods (Optional) |
| Use GroupId | Enable or disable the use of product group ID in the authorization request |
| Debug Logfile | Enable or disable saving debug data to a log file (Recommended) |
| Debug mail | Enable or disable sending debug log data via email (Recommended) |
| Debug Email To | Email address to receive debug log data (Recommended) |
| Payment for Applicable Customer Groups | Show Riverty payment method only for selected customer groups (Optional) |
| Enable Phone Number Input Field | Show or hide the phone number field on the payment method (Optional) |
| Merchant ID | Used for calling terms and conditions links in REST payments (Optional) |
| Disable Alternative Billing Address | Disables the billing address step for this payment method on the checkout page (Optional) |
Order management settings
An introduction to Magento REST services and how to perform Magento 2 order management actions
Important: In versions below 2.5.1 it is only possible to create full captures.
First, make sure that capturing is set to manual in Stores => Configuration => Sales => Payment Methods => Riverty Developer Settings => Capture Mode. To enable the configuration option for using captures and refunds a serial key is required. This serial key is: hc35aDjCDu7esWE
Note. If you have to adjust the settings, do not forget to refresh the configuration cache in System => Cache management.

Capture Modes:
These settings control when the Riverty plugin sends a capture request to Riverty checkout API (and how invoicing is handled in Magento).
1. Manual: Capture is only triggered by a deliberate action in Magento (Admin), via Magento API, or via an ERP/integration that performs the capture step.
Use when: you invoice/ship manually, use an ERP-driven process, or need full control over when capture happens.
2. Yes, direct (current default): Magento creates an invoice in Magento. After the order is placed/authorized, the Riverty plugins uses that invoice/order data to send the Capture request to Riverty Checkout API (depending on the selected capture mode)
Note. “invoice created” in the Magento Admin means that object is always a Magento invoice -the Riverty plugin is just orchestrating when Magento creates it and when the Riverty plugin sends a capture to Riverty Checkout API.
Use when: you ship immediately and want capture to happen right away.
3. Off: Disable all communication regarding capturing and refunding towards Riverty. For example an invoice will not have the option to 'online' capture the order. This is applicable if you don't want any order management (captures / refunds) communication with Riverty. For example if Riverty has the auto-capture functionality enabled in the Riverty back-end systems.
4. Yes, at shipping: after authorization, the order will be created and set to processing. But no invoice is created. This will be created and captured when a shipment is created. Rivery plugin does not capture immediately after authorization. Capture is triggered when a shipment is created.
Use when: capture should align with fulfillment/shipping.
In case you can only ship when an invoice is created, then the configuration should be set to 'manual'. Then you will get an option for 'auto invoice creation', which should be set to 'yes'. Same as for the options "Force invoice state to PAID instead of PENDING" and "Force capture to be triggered by shipment". This is applicable if you have different processing times of the shipment. This will be the default in the next release, because this setting is applicable for the majority of merchants.
5. Yes, at selected status: Capture is triggered when the order reaches a specific configured order status.
After authorization, the order will be created and set to processing. But no invoice is created. This will be created and captured when the order is set to the configured status.
Use when: order management is handled outside Magento (e.g., Riverty auto-capture enabled in Riverty systems, or another system is responsible).
Auto invoice creation:
Controls whether Magento should create the invoice document automatically (separate from whether capture happens immediately).
- Yes: With setting this option to ‘Yes’, you can enable the automatic creation of invoice without capture being done. There must be a shipment so that the capture takes place. Typically used when you want an invoice created early for internal processes, while capture is still triggered later (e.g., at shipment).
- No: With setting this option to ‘no’, the Riverty plugin will not automatically create an invoice. Magento does not auto-create invoices. You (or your ERP) must create/capture manually when appropriate. If you are testing, you will need to manually go into the order details in the admin panel, select the order and capture it. After that there will be an invoice and then a capture (full or partial capture). After that they have to click on "invoice"
- Force invoice state to PAID instead of PENDING - when set to ‘yes’ This option gives the possibility to set invoices to status PAID, instead of PENDING, , even if capture has not happened yet. This is particularly useful for cases you want to export paid Magento invoices, but do not want to have the invoice captured yet.
- Force capture to be triggered by shipment - This option gives the possibility to capture the order based on the shipment. You can create the shipment in Magento and based on that the invoice will be captured.
Important note: A full shipment will trigger a full capture on the original invoice. A partial shipment will cancel the original invoice and create a new invoice based on the items selected in the shipment. This new invoice will get the status PAID. So if you use an export of invoices with the status 'paid' it should be certain not to import these new invoices again.
- Status Capture Request Accepted: Assign the Magento status that will be applied when Riverty confirms a successful capture
- Status Capture Request Refused: Assign the Magento status that will be applied to the order in case Riverty declines the capture request.
- Enable Refund: Enables refunds from Magento to Riverty (usually via Credit Memo)
- Use Void For Cancelled Uncaptured Orders: If an order is cancelled before capture, Riverty plugin will send a void/cancel request
- Calculate Discount Per Item In The Cart: Controls discount allocation. This setting affects how discounts are split across items (not how VAT/tax rates are calculated). Enable it when discounts are used, especially with mixed tax classes.
- Yes / Enabled: The plugin calculates and applies the discount per order item line (line-level discount allocation).
- No / Disabled: The discount is applied as a single order-level discount amount/line, rather than distributed per item.
Use when: a discount is applied (coupon, cart rule, promotion), especially if the cart contains items with different tax classes/rates. Allocating discounts per item helps ensure the discount and tax/VAT are distributed correctly per line item for reporting/accounting consistency.
- Error message timeout in ms: With this configuration option you can decide how long an error message should be shown in the checkout. Error messages automatically disappears quite fast in the default Magento setup with this option you can adjust this behavior.
- Allowed Developer IP: Here the developer can fill in it's IP address if IP restriction is enabled, to make the payment methods visible only for this IP.